Create ChatBot
It is the part of creating an intelligent assistant that can help users like a real person in pre-sales and after-sales issues on e-commerce sites. The chatbot can give ready-made answers to users, or it can give dynamic answers according to the user's information and past orders. Users can be provided to reach agents at points determined according to the fiction of the chatbot.
You can reach CollectAction's chatbot creation section at https://app.collectaction.com/bot/


In this section, you can see the features that help you develop a chatbot compatible with your Ecommerce infrastructure. From this panel, you can decide which categories the chatbot will be used for and which operations will be performed in the sub-branches of these categories. You can sort the categories and subcategories according to the order you want and then test them from the chat section in the panel.
How can I improve the chatbot?
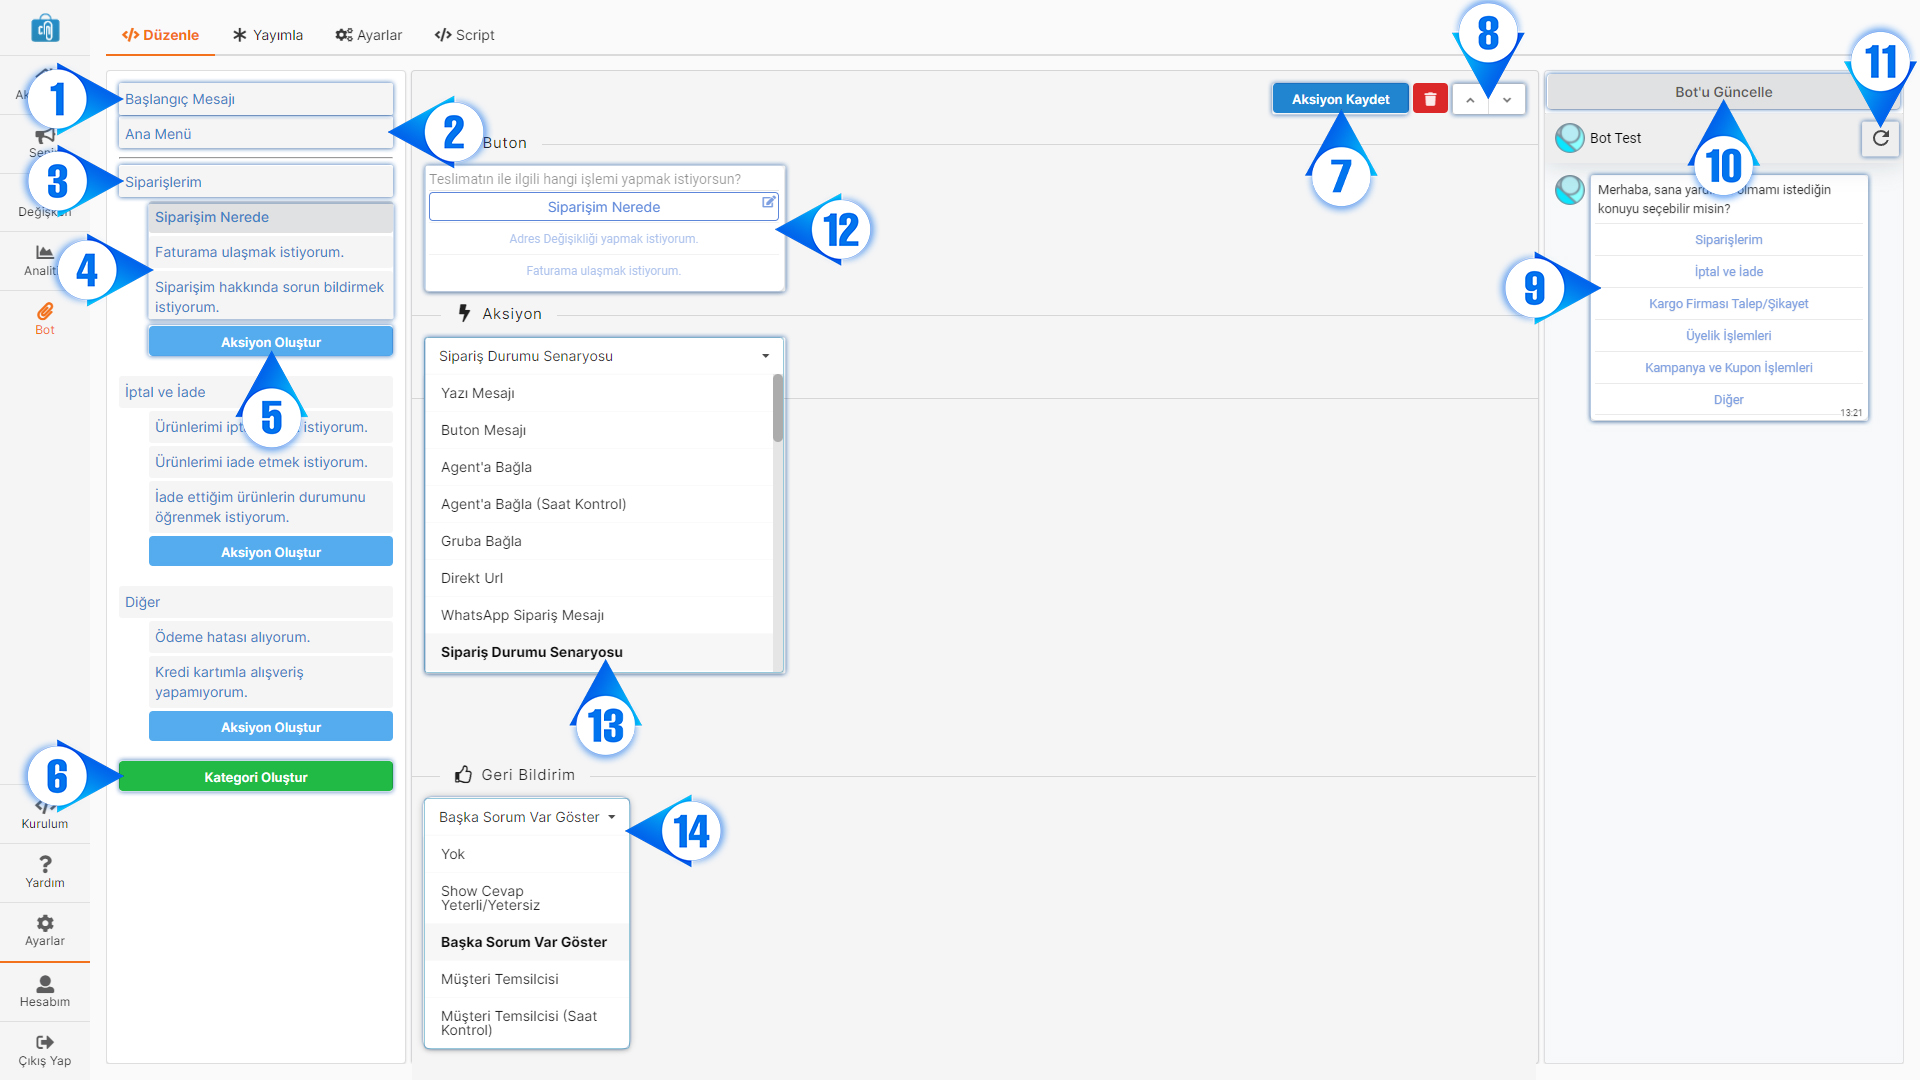
1- Start Message (Welcome Message) It is a welcome message that will be the introduction to the conversation when a new conversation starts and will only appear once. It comes before the main menu. This feature is optional.
2- Main Menu Below are the menu buttons that are automatically created according to the categories you create. The system has a main menu created by default. This menu can be edited as desired.
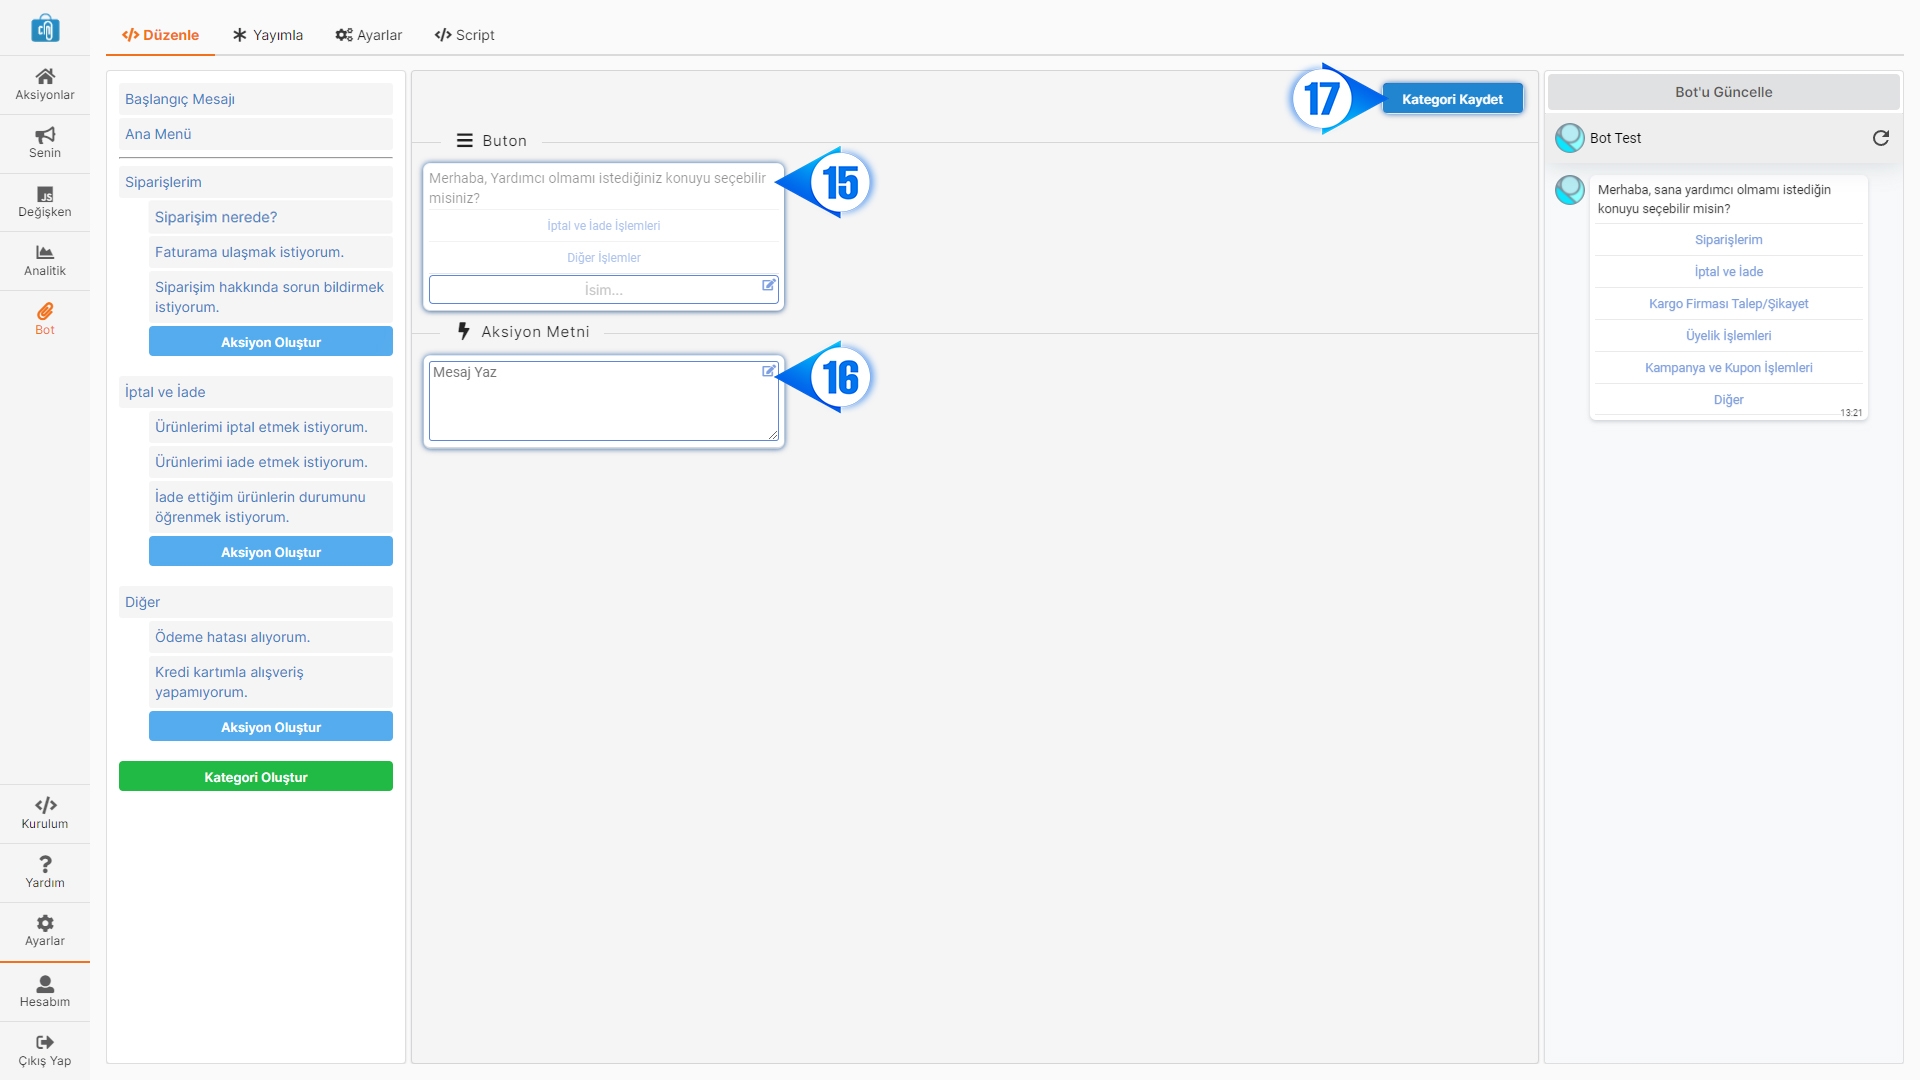
3- Category Categories are the buttons in the bot's main menu. When you click on a category name, the editor of that category appears and you can edit the "Category Name"(15) and "Action Text"(16). "Category Name" is the name that will appear in the main menu. Pressing it will list the action buttons under this category. The text above this list is the "Action Text". When you want to create a new category, you can add an empty category at the bottom and edit it by saying "Create Category"(6). You can save it with the "Save Category"(17) button and continue with the next actions.
4- Actions It is the section under the categories that helps the user with their questions. When you press an action or the "Create Action"(5) button, the editor screen appears in the center panel. You can enter "Action Name"(12) in the button and select an action. You can show different results to the user according to your request. You can show results that you can specify yourself such as text, buttons, you can show a redirect button to the representative, you can give a direct link and redirect to a page you want, or you can put the user in the flow with post-order support scenarios prepared with e-commerce infrastructures services.(13)
5- Create Action Adds a new action to the category it is under.
6- Create Category Adds a new category at the end of the main menu.
7- Save and Delete Buttons to save changes or delete the action or category when the action or category is pressed.
8- Sort Buttons These are the buttons that allow you to change the order of the action or category.
9- Bot View It is the test section where you can test the bot you have created.
10- Update Bot It allows you to update the test bot according to the changes you make on the left side.
11- Refresh Bot Restarts the bot.
12- Action Name This is where you enter the name of the action button.
13- Action Type This is the section where you can specify action types.
Text message: You can answer the question as a text here. Button Message: It allows you to respond to users you want to direct with a link with buttons containing text and links. Connect to Agent: In the related step, you can remove a button that will connect the user to the agent. Users who click on this bot switch from the bot to the waiting side on the chat screen and wait for the agents to connect. Direct URL: Turns the action button into a link and opens the page in a new tab without any message.
Scenarios
Order Status: It lists the orders of the logged in user and returns the status of the selected order and the cargo link if it is in cargo.
Order Invoice: If the invoice of the selected order has been created, it returns the invoice link.
Order Error: This is the scenario for reporting a problem with the selected order. - Wrong Product: Order products are listed and the wrong product is selected and the necessary information is obtained and forwarded to the representative. - My Order Arrived Damaged: Instructions on how to deal with the damaged product and redirects to the page. - Missing Product in My Order: Order products are listed and the missing product is selected and the necessary information for the representative is obtained and routing is made. - My Order Didn't Arrive: It redirects to the agent to provide information with the order number taken. Product Exchange: Instructions on how to make the exchange and redirects to the page.
Product refund: The product to be returned is selected and the return service is called, after which the code and cargo company information required for return is given.
History of returned products: Shows the status of returned products.
Delivered to the Wrong Person: It will be forwarded to the representative with the order number.
Cargo Company did not accept: It will be forwarded to the agent with the return code. In addition, there are versions of these scenarios that are not based on logged-in user information but on the phone number.
14- Feedback Feedback is the action to be taken when the action is finished. If you want, you can direct them directly to the main menu or you can direct them to the representatives with the "Response is Adequate" and "Response is Not Adequate" options.
Last updated